Embarking on a journey into the intricate world of sewing unveils a universe where creativity knows no bounds. At the heart of this creative endeavor lies the quintessential tool: the sewing machine. Ever wondered what makes up this marvelous invention? Delving into the anatomy of a sewing machine unveils a fascinating array of components, each playing a pivotal role in transforming fabrics into works of art.
From the needle that weaves intricate patterns to the bobbin that holds the thread, every part contributes to the seamless symphony of stitches. Let’s unravel the magic as we explore what are the parts of sewing machine together.
Contents
- 1 Salient Points
- 2 What is a Sewing Machine and How It Works?
- 3 What Are the Parts of Sewing Machine?
- 4 Troubleshooting Common Sewing Machine Issues
- 5 Sewing Machine Maintenance Tips
- 6 Conclusion
- 7 References
- 8 Frequently Asked Questions
- 8.1 How Do I Properly Clean and Maintain My Sewing Machine?
- 8.2 What Are Some Common Troubleshooting Tips for a Sewing Machine That Is Not Stitching Correctly?
- 8.3 Can I Use Different Types of Thread With My Sewing Machine?
- 8.4 Are There Any Safety Precautions I Should Take When Using a Sewing Machine?
- 8.5 How Often Should I Replace the Needle in My Sewing Machine?
Salient Points
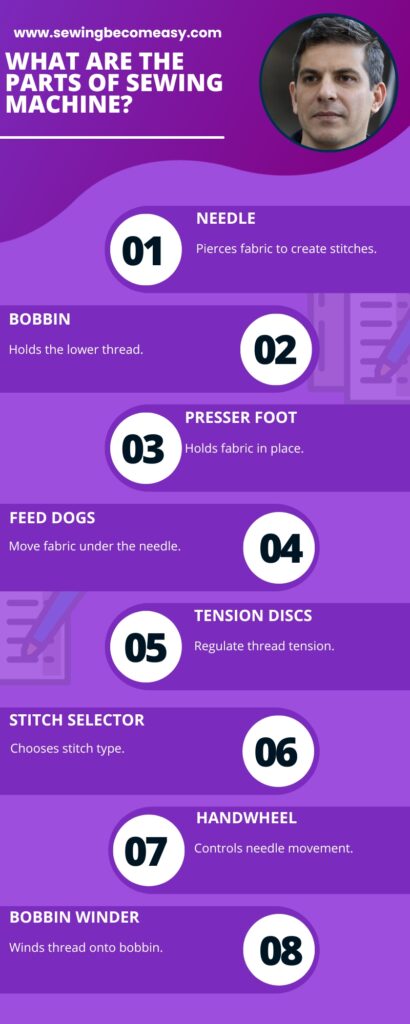
- The essential parts of a sewing machine include the needle, presser foot, bobbin, feed dogs, and handwheel.
- There are different types of needles available for specific fabrics and sewing techniques, such as universal needles, ballpoint needles, and leather needles.
- Various types of presser feet are available for specific sewing tasks and functions, including pressure control, seam guiding, fabric feeding, and specialized attachments.
- Proper bobbin threading techniques are crucial for high-quality stitches, and troubleshooting bobbin issues, such as tension and correct insertion, is important.
What is a Sewing Machine and How It Works?
A sewing machine is a device that stitches fabric and other materials together with thread. It consists of several key components that work together to create stitches. Understanding how a sewing machine works can help you utilize its capabilities effectively.
The main components of a sewing machine include the needle, presser foot, feed dog, bobbin, and bobbin case. The needle is responsible for piercing the fabric, while the presser foot holds the fabric in place. The feed dog moves the fabric through the machine, and the bobbin holds the lower thread, which is interlocked with the upper thread from the needle.
To operate a sewing machine, first, you need to prepare the bobbin by winding it with thread and inserting it into the bobbin case. Then, you thread the upper thread through the needle and the machine’s various guides and tension disks.
Once the machine is threaded, you position the fabric under the presser foot and lower it. As you start sewing, the needle moves up and down, piercing the fabric and creating stitches. The feed dog pulls the fabric forward, allowing for a smooth and even stitch.
Different types of stitches can be achieved by adjusting the stitch length and stitch width settings on the machine. For example, a longer stitch length is used for basting or gathering, while a shorter stitch length is ideal for securing seams.
Maintenance of a sewing machine is crucial for its proper functioning. This includes regular cleaning to remove lint and debris, oiling moving parts to reduce friction, and checking tension settings to ensure balanced stitches.
In summary, a sewing machine works by using a combination of needles, thread, feed dogs, and other components to stitch fabric together. By understanding its various parts and how they function, you can effectively utilize a sewing machine for various sewing projects.

What Are the Parts of Sewing Machine?
Understanding the components of a sewing machine is essential for anyone looking to operate or maintain one. Here’s a breakdown of its key parts:
- Spool Pin: A small rod that holds the thread spool in place.
- Bobbin: A small spool that holds the lower thread in a sewing machine.
- Bobbin Case: Holds the bobbin in place and ensures proper tension.
- Needle: The sharp tool that pierces the fabric to create stitches.
- Needle Clamp: Holds the needle in place and secures it during sewing.
- Presser Foot: A metal attachment that holds the fabric in place while sewing.
- Feed Dog: A set of metal teeth that move the fabric under the presser foot to create stitches.
- Stitch Selector: A dial or lever that allows you to choose different stitch patterns.
- Tension Control: Regulates the tightness of the upper thread during sewing.
- Thread Guides: Small metal pieces that guide the thread through the machine.
- Hand Wheel: A large wheel on the side of the machine that allows you to manually raise and lower the needle.
- Reverse Stitch Lever/Button: Allows you to sew backward to reinforce stitches.
- Power Switch: Turns the sewing machine on and off.
- Foot Pedal: Controls the speed of the machine. Pressing it harder makes the machine go faster.
- Light: Provides illumination over the sewing area for better visibility.
- Bobbin Winder: A mechanism that winds thread onto the bobbin.
- Thread Cutter: A built-in blade or notch for cutting the thread after sewing.
Let’s discuss the parts of a sewing machine in detail now.
Spool Pin
The spool pin is a crucial component of a sewing machine, responsible for holding the thread spool securely in place. Without it, the thread would not feed correctly into the machine during sewing. Here’s a brief explanation of its role and functionality:
- Location: Typically located on the top of the sewing machine, the spool pin is often a vertical rod or pin around which the thread spool is placed.
- Secure Placement: The spool pin is designed to hold the thread spool firmly in place to prevent it from rolling around or falling off during sewing operations.
- Thread Guidance: As the thread unwinds from the spool during sewing, the spool pin ensures that it feeds smoothly into the machine’s threading mechanism, reducing the risk of tangling or knotting.
- Compatibility: Different sewing machines may feature variations in the design of the spool pin, but the fundamental purpose remains the same across various models.
Bobbin
The bobbin is a small, cylindrical spool that holds the lower thread in a sewing machine. It plays a crucial role in the formation of stitches along with the upper thread. Here’s an overview of its significance and operation:
- Location: The bobbin is typically housed in a bobbin case located beneath the needle plate of the sewing machine.
- Thread Supply: As the upper thread passes through the needle and into the fabric, the bobbin thread comes up from below to interlock with it, forming a stitch.
- Tension Regulation: The tension of the bobbin thread is regulated by the tension mechanism within the bobbin case or by external adjustments, ensuring balanced stitch formation.
- Refilling: When the bobbin thread runs out, it needs to be refilled. This is typically done by removing the bobbin case, placing a new bobbin onto the bobbin winder, and winding it with thread from the spool.
Bobbin Case
The bobbin case is a component that holds the bobbin in place within the sewing machine. It ensures proper tension and smooth feeding of the bobbin thread during sewing. Here’s a closer look at its function and features:
- Location: The bobbin case is usually situated beneath the needle plate of the sewing machine, where it securely houses the bobbin.
- Tension Adjustment: Many bobbin cases feature a tension screw or dial that allows users to adjust the tension of the bobbin thread to achieve balanced stitches.
- Thread Path: The bobbin thread passes through specific channels or guides within the bobbin case, guiding it smoothly as it feeds into the machine during sewing.
- Compatibility: Bobbin cases may vary in design and compatibility across different sewing machine models, so it’s essential to use the correct bobbin case for your machine to ensure proper operation.
Needle
The needle is a small, slender tool with a pointed end that pierces the fabric to create stitches. It is one of the most essential components of a sewing machine. Here’s a detailed overview of its significance and functionality:
- Piercing Function: The needle’s primary function is to penetrate the fabric as the sewing machine operates, creating a path for the thread to form stitches.
- Size and Type: Needles come in various sizes and types, each suited for specific fabrics and sewing tasks. Common needle types include universal, ballpoint, and denim needles, among others, catering to different fabric weights and compositions.
- Compatibility: It’s crucial to use the correct needle size and type for the fabric being sewn to ensure smooth stitching and prevent damage to both the fabric and the needle itself.
- Replacement: Needles can become dull or damaged over time, affecting stitch quality. Regularly replacing the needle with a fresh one is essential for optimal sewing performance.
Needle Clamp
The needle clamp is a mechanism that holds the needle securely in place within the sewing machine. It plays a vital role in ensuring stable needle positioning during sewing operations. Here’s a breakdown of its function and operation:
- Securing the Needle: The needle clamp consists of a clamp or holder that grips the top portion of the needle, preventing it from moving or loosening during sewing.
- Stability: Proper tightening of the needle clamp is crucial for maintaining needle stability while sewing, preventing issues such as needle deflection or breakage.
- Adjustment: Some sewing machines may feature needle clamp mechanisms that allow for adjustments to accommodate different needle sizes or positions, providing versatility for various sewing tasks.
- Maintenance: Periodically checking and tightening the needle clamp ensures optimal needle positioning and reduces the risk of sewing machine malfunctions during use.
Presser Foot
The presser foot is a metal attachment located above the needle plate of a sewing machine. It serves several essential functions in the sewing process. Here’s an overview of its role and features:
- Fabric Control: The presser foot holds the fabric flat against the needle plate, preventing it from shifting or puckering during sewing.
- Stitch Formation: By applying downward pressure on the fabric, the presser foot helps ensure proper stitch formation and uniform stitch quality.
- Types: Different presser feet are available for various sewing tasks, such as zigzag stitching, buttonholing, and quilting. Using the appropriate presser foot for each task enhances sewing precision and efficiency.
- Adjustability: Some sewing machines allow for presser foot pressure adjustment, enabling users to customize the amount of pressure exerted on the fabric based on the fabric type and thickness being sewn. This feature helps prevent fabric distortion and improves sewing results.
Feed Dog
The feed dog is a crucial component located beneath the needle plate of a sewing machine. It plays a vital role in advancing the fabric forward during the sewing process. Here’s a detailed explanation of its function and significance:
- Fabric Movement: The feed dog consists of a set of metal teeth that protrude through slots in the needle plate. As the sewing machine operates, these teeth grip the fabric from below and move it steadily forward with each stitch.
- Stitch Consistency: By feeding the fabric uniformly under the presser foot, the feed dog ensures consistent stitch length and prevents fabric bunching or uneven stitching.
- Adjustability: Some sewing machines feature adjustable feed dog settings, allowing users to raise or lower the feed dog or even disengage it entirely. These adjustments are useful for specialized sewing techniques such as free-motion quilting or darning.
- Maintenance: Keeping the feed dog clean and free from lint or debris is essential for optimal performance. Regular cleaning and lubrication help prevent feed dog malfunctions and ensure smooth fabric movement during sewing.
Stitch Selector
The stitch selector is a control mechanism on a sewing machine that allows users to choose from various stitch patterns or configurations. It provides versatility and customization options for different sewing projects. Here’s an overview of its function and operation:
- Stitch Options: The stitch selector typically consists of a dial, lever, or electronic interface with markings indicating different stitch patterns such as straight stitch, zigzag stitch, decorative stitches, and more.
- Selection Process: Users can adjust the stitch selector to the desired stitch pattern before or during sewing, depending on the machine’s design. Once selected, the sewing machine will produce stitches according to the chosen pattern.
- Versatility: Modern sewing machines may offer a wide range of stitch options accessible through the stitch selector, catering to various garment construction, embellishment, and quilting needs.
- Reference Guide: Some sewing machines provide a stitch selector guide or chart detailing the available stitch patterns and their recommended uses. This resource helps users select the most suitable stitch for their specific sewing project.
Tension Control
The tension control mechanism on a sewing machine regulates the tightness of the upper thread during the sewing process. Proper tension is essential for achieving balanced and well-formed stitches. Here’s a breakdown of its function and importance:
- Balanced Stitch Formation: Tension control ensures that the upper thread and bobbin thread are pulled with the appropriate amount of force, allowing them to interlock evenly within the fabric layers and create uniform stitches.
- Adjustability: Most sewing machines feature tension adjustment settings that allow users to increase or decrease the tension as needed. Fine-tuning the tension ensures optimal stitch quality when working with different fabric types and thicknesses.
- Thread Compatibility: Proper tension settings vary depending on factors such as thread type, thread weight, and fabric thickness. Understanding how tension adjustments affect stitch appearance is essential for achieving desired sewing results.
- Troubleshooting: Incorrect tension settings can lead to stitching problems such as loose or tight stitches, thread breakage, or puckering. Knowing how to adjust tension and troubleshoot tension-related issues is fundamental for successful sewing.
Thread Guides
Thread guides are small metal components located within a sewing machine that help direct the path of the thread as it moves through the machine. Understanding their function is crucial for ensuring smooth thread delivery and stitch formation. Here’s a detailed explanation:
- Thread Routing: Thread guides are strategically placed along the threading path of the sewing machine, guiding the thread from the spool through various tension points and ultimately to the needle.
- Preventing Tangling: By keeping the thread in a designated path, thread guides minimize the risk of tangling or looping, ensuring consistent thread tension and stitch quality during sewing.
- Location Variation: Thread guides may vary in location and design depending on the specific sewing machine model. Common locations include the spool pin, tension discs, and needle bar, among others.
- Thread Stability: Proper threading through the designated thread guides helps stabilize the thread as it travels through the machine, reducing the likelihood of thread breakage or other sewing issues.
Hand Wheel
The hand wheel is a large wheel located on the side of a sewing machine, typically used for manually raising and lowering the needle and controlling the stitching process. Understanding its function is essential for manual sewing operations and troubleshooting. Here’s an overview:
- Manual Needle Control: Rotating the hand wheel clockwise or counterclockwise allows users to manually raise or lower the needle, providing precise control over needle positioning for tasks such as threading, starting or ending stitches, or adjusting fabric placement.
- Stitch Control: When the sewing machine is not in use or when performing delicate stitching maneuvers, manually turning the hand wheel provides a slower, more controlled stitching speed compared to using the foot pedal.
- Thread Take-Up: The hand wheel is often connected to the machine’s internal mechanisms responsible for moving the needle and forming stitches. Rotating the hand wheel initiates these actions, drawing the upper thread down into the fabric and interlocking it with the bobbin thread to create stitches.
- Emergency Stop: In case of machine malfunctions or thread jams, manually turning the hand wheel backward (counter-clockwise) can help disengage the machine’s mechanisms and release tension, allowing users to safely address the issue without causing damage to the machine or project.
Reverse Stitch Lever/Button
The reverse stitch lever or button is a control mechanism on a sewing machine that allows users to sew stitches in the opposite direction, reinforcing seams and securing the ends of stitches. Understanding how to use this feature is essential for creating durable and professional-quality seams. Here’s a breakdown:
- Reinforcing Seams: Engaging the reverse stitch function causes the sewing machine to sew stitches in reverse, effectively locking the beginning and end of a seam to prevent unraveling.
- Securing Ends: Sewing a few reverse stitches at the beginning and end of a seam helps secure the thread tails, preventing them from unraveling or coming loose over time.
- Operational Control: Depending on the sewing machine model, the reverse stitch function may be activated using a lever, button, or switch located on the machine’s control panel or sewing head.
- Usage Technique: To use the reverse stitch function, simply engage the lever or press the button while sewing forward. Once the desired length of reverse stitching is achieved, release the lever or button to resume forward stitching.
Power Switch
The power switch on a sewing machine controls the electrical power supply, allowing users to turn the machine on or off. Understanding its function and operation is essential for safely operating the sewing machine and conserving energy. Here’s an overview:
- Power Control: The power switch serves as the primary means of activating or deactivating the sewing machine. When turned on, it allows electrical current to flow to the machine’s internal components, enabling it to function.
- Safety Feature: Turning off the power switch when the sewing machine is not in use helps prevent accidents and conserves energy. It’s important to develop the habit of switching off the machine after each sewing session to reduce the risk of electrical hazards and prolong the machine’s lifespan.
- Location: The power switch is typically located on the sewing machine’s housing or control panel for easy access. It may be a simple toggle switch, push-button, or rotary dial, depending on the machine’s design.
- Indicator Lights: Some sewing machines feature indicator lights associated with the power switch to signal whether the machine is powered on or off, providing visual feedback to users.
Foot Pedal
The foot pedal, also known as the foot controller or sewing machine pedal, is a control device that regulates the sewing machine’s speed. Understanding how to use the foot pedal effectively is essential for controlling stitching pace and achieving precise sewing results. Here’s a detailed explanation:
- Speed Control: Pressing down on the foot pedal increases the sewing machine’s speed, while releasing pressure slows it down or stops it entirely. The amount of pressure applied to the pedal determines the stitching pace, offering users precise control over sewing speed.
- Hands-Free Operation: The foot pedal allows for hands-free operation of the sewing machine, freeing up the user’s hands to guide the fabric and manipulate the workpiece as needed.
- Variable Speed: Sewing machine pedals typically offer variable speed control, meaning users can adjust the stitching pace according to the requirements of the sewing project. This versatility is particularly useful when sewing different fabric types or executing intricate stitching maneuvers.
- Compatibility: Most sewing machines are designed to be compatible with a standard foot pedal connection, ensuring interchangeability between different machines and pedal models.
Light
The light on a sewing machine provides illumination over the sewing area, enhancing visibility and making it easier to see the fabric and stitching details. Understanding its function and importance is crucial for achieving accurate sewing results and reducing eye strain. Here’s an overview:
- Visibility Enhancement: The light illuminates the area around the needle and presser foot, making it easier to see the fabric, stitch lines, and markings. This improved visibility allows for more precise stitching and helps prevent mistakes.
- Eye Strain Reduction: Sewing for extended periods in poorly lit conditions can strain the eyes and cause fatigue. The light on a sewing machine helps reduce eye strain by providing adequate illumination, allowing users to sew comfortably for longer durations.
- Adjustability: Some sewing machines feature adjustable lights that allow users to customize the brightness or angle of the light to suit their preferences and working environment.
- Location: The light is typically integrated into the sewing machine’s housing or positioned near the needle area for optimal illumination. It may be a built-in LED light or a detachable accessory light, depending on the machine’s design.
Bobbin Winder
The bobbin winder is a mechanism on a sewing machine specifically designed for winding thread onto the bobbin. Understanding its function and operation is essential for preparing bobbins with the required amount of thread for sewing. Here’s a detailed explanation:
- Purpose: The bobbin winder serves the primary purpose of winding thread onto an empty bobbin, ensuring that an adequate supply of bobbin thread is available for sewing operations.
- Location: The bobbin winder is typically located on the top or side of the sewing machine, near the spool pin. It may feature a separate winding spindle or be integrated into the machine’s main housing.
- Operation: To use the bobbin winder, the user places an empty bobbin onto the designated spindle and threads the thread through the bobbin winding path. Engaging the bobbin winder mechanism then activates the winding process, causing the bobbin to rotate while the thread is wound evenly around it.
- Thread Tension: Some sewing machines feature adjustable tension settings for the bobbin winder, allowing users to control the tension of the thread as it winds onto the bobbin. Proper tension adjustment ensures smooth and even winding, preventing thread bunching or tangling.
Thread Cutter
The thread cutter is a built-in feature on many sewing machines designed for conveniently cutting the thread after sewing without the need for additional tools. Understanding its location and operation is essential for streamlining the sewing process. Here’s an overview:
- Location: The thread cutter is typically located on the sewing machine’s housing or control panel, within easy reach of the user’s sewing area. It may be a small blade integrated into the machine’s body or a notched edge designed for thread cutting.
- Convenience: The thread cutter provides a convenient means of cutting the thread after sewing, eliminating the need to reach for scissors or other cutting tools. This saves time and effort, especially when sewing multiple seams consecutively.
- Operation: To use the thread cutter, the user simply guides the thread to the cutter’s location after completing a seam and pulls it against the sharp edge or blade. The thread is then cut cleanly and efficiently, ready for the next sewing task.
- Safety: Some thread cutters feature retractable or covered blades to ensure user safety when not in use. Proper handling and caution are advised when using the thread cutter to avoid accidental injury.
Troubleshooting Common Sewing Machine Issues
When using sewing machines, encountering issues can disrupt production and cause frustration. Here’s a guide to troubleshooting common problems:
| Issue | Possible Cause | Solution |
|---|---|---|
| Thread Breakage | – Incorrect tension settings. | – Adjust the tension discs according to the thread type. |
| – Dull needle or wrong needle size. | – Replace the needle with the correct type and size. | |
| – Thread quality issues. | – Use high-quality thread suitable for the material. | |
| Uneven Stitches | – Incorrect tension settings. | – Re-adjust the tension for balanced stitches. |
| – Dirty or damaged feed dogs. | – Clean or replace feed dogs as necessary. | |
| – Worn or bent needle. | – Replace the needle with a new one. | |
| Machine Jamming | – Thread buildup in the bobbin area. | – Clean the bobbin area regularly to prevent buildup. |
| – Incorrect needle insertion. | – Ensure the needle is inserted correctly and tightened. | |
| – Machine misalignment. | – Consult a technician to realign the machine parts. | |
| Skipped Stitches | – Improper needle threading. | – Rethread the needle following the correct path. |
| – Incorrect needle size for the fabric. | – Use a needle appropriate for the fabric thickness. | |
| – Machine timing issues. | – Have a professional adjust the timing if necessary. | |
| Fabric Puckering | – Incorrect tension settings. | – Adjust the tension for smoother fabric feed. |
| – Incorrect presser foot pressure. | – Adjust the presser foot pressure according to fabric. | |
| – Dull or damaged needle. | – Replace the needle regularly to prevent puckering. |
Remember, regular maintenance and cleaning can prevent many of these issues. If problems persist, consult the machine manual or seek assistance from a qualified technician.
Sewing Machine Maintenance Tips
Maintaining an sewing machine is crucial for ensuring smooth operation and longevity of the equipment. Here are some maintenance tips to keep your machine running efficiently:
- Clean regularly: Dust and debris can accumulate, affecting the machine’s performance. Use a brush or compressed air to remove dirt from the machine’s exterior and interior components.
- Oil moving parts: Lubricate moving parts regularly as per the manufacturer’s recommendations. This includes the needle bar, presser foot lever, and bobbin case. Proper lubrication reduces friction and prevents wear and tear.
- Check tension regularly: Incorrect thread tension can result in uneven stitches or thread breakage. Ensure the tension discs are clean and adjust the tension according to the fabric being sewn.
- Inspect needles: Worn or bent needles can damage the fabric and affect stitch quality. Replace needles regularly, especially after sewing heavy materials or if needles become dull.
- Keep the workspace clean: A clutter-free workspace reduces the risk of accidents and allows for efficient operation. Dispose of fabric scraps and thread waste regularly.
- Monitor belt tension: The drive belt transfers power from the motor to the sewing mechanism. Check the belt tension periodically and adjust it if it’s too loose or too tight to ensure smooth operation.
- Calibrate machine settings: Periodically check and adjust stitch length and speed settings to suit the sewing project. Improper settings can result in poor stitch quality or fabric damage.
- Schedule professional maintenance: While regular maintenance can prevent many issues, it’s also essential to have the machine serviced by a professional periodically. They can identify and address any underlying problems.
Conclusion
In conclusion of what are the parts of sewing machine, we discussed that each element of the sewing machine, from the “bobbin” to the “presser foot,” plays a pivotal role in your sewing journey. Understanding these parts is not only essential for troubleshooting but also empowers you to unleash your creativity.
So, next time you sit down at your sewing table, take a moment to appreciate the parts of sewing machine that work harmoniously to transform your ideas into beautiful, tangible creations. Mastering these components will elevate your sewing skills and open doors to endless possibilities in the world of fabric artistry.
References
- Evaluation of ergonomic working conditions among standing sewing machine operators in Sri Lanka
- Prevalence of ergonomic hazards and persistent work-related musculoskeletal pain among textile sewing machine operators
- Seam pucker indicators and their dependence upon the parameters of a sewing machine
- Mechatronic design optimization of the mechanism in a sewing machine
Frequently Asked Questions
How Do I Properly Clean and Maintain My Sewing Machine?
Proper cleaning techniques and sewing machine maintenance tips are essential for maintaining the longevity and performance of your machine. Regularly remove lint and dust, oil the necessary parts, and follow the manufacturer’s instructions for specific maintenance procedures.
What Are Some Common Troubleshooting Tips for a Sewing Machine That Is Not Stitching Correctly?
When experiencing stitching problems with a sewing machine, it is important to troubleshoot the issue by checking the tension, needle, and thread. Adjusting the tension, replacing the needle, or using the correct thread can often resolve stitching problems.
Can I Use Different Types of Thread With My Sewing Machine?
Different types of thread can be used with a sewing machine, but it is essential to consider their compatibility with the machine. Understanding the specific requirements of your machine will ensure optimal stitching results.
Are There Any Safety Precautions I Should Take When Using a Sewing Machine?
When using a sewing machine, it is important to take safety precautions and ensure proper usage. This includes wearing appropriate protective gear, such as safety glasses, and using the machine in a well-lit and ventilated area.
How Often Should I Replace the Needle in My Sewing Machine?
The frequency of needle replacement in a sewing machine depends on various factors such as the type of needle used, the type of fabric being sewn, and the intensity of use. It is recommended to replace the needle after 8-10 hours of sewing or at the first sign of dullness or damage.