Embarking on a sewing journey can be both exciting and challenging, especially when faced with questions like, Can You Reverse Stitch With a Walking Foot? For those threading through the intricacies of stitching, this query often tugs at the fabric of curiosity.
Imagine a tool that dances harmoniously with your creative stitches, moving forward, but what about retracing those steps? In the rhythm of crafting, the walking foot becomes a trusted partner, guiding your stitches like a choreographed dance. But can it reverse? The answer lies in the symphony of sewing, a tale woven in each deliberate step. Let’s unravel the secrets together.
TLDR
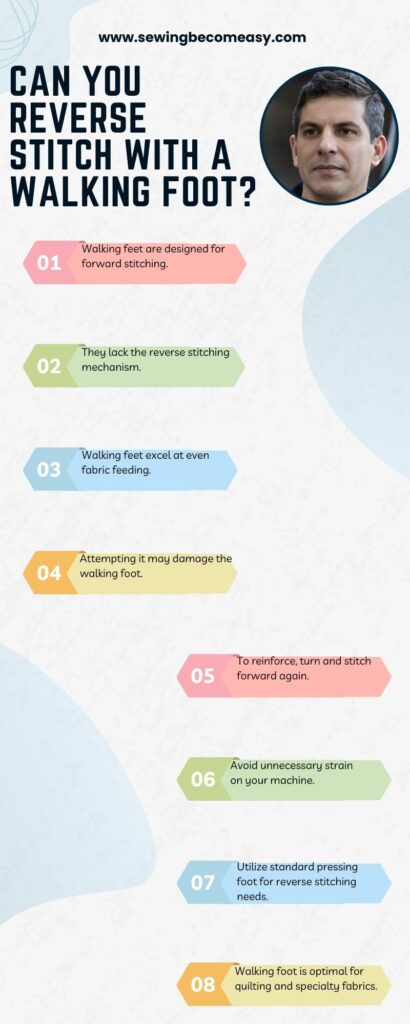
- Walking foot is not designed for reverse stitching: Due to its specific design for even fabric feed, a walking foot lacks the mechanism needed for effective reverse stitching.
- Engaging reverse stitching with a walking foot may cause issues: Attempting to use reverse stitching with a walking foot can lead to problems such as uneven stitching or fabric bunching, as the foot lacks the necessary reverse mechanism.
- Walking foot’s primary function is forward stitching: It excels at maintaining consistent fabric feed during forward stitching, preventing layers from shifting during the sewing process.
- Switch to a regular presser foot for reverse stitching: When reverse stitching is required, it is advisable to switch to a standard presser foot compatible with the sewing machine’s reverse function, ensuring smooth and effective results.
What is a Reverse Stitch?
In sewing, a Reverse Stitch serves as a fundamental function that adds strength and durability to seams. When sewing a garment or fabric, the reverse stitch is a technique used to reinforce the beginning and end of a seam. This involves stitching backward over the same line of stitches that were just sewn forward. Essentially, it creates a secure anchor for the thread, preventing it from unraveling over time.
To execute a reverse stitch, you typically find a lever or button on your sewing machine labeled “reverse” or “backstitch.” Pressing or activating this function causes the machine to sew in the opposite direction momentarily. It is common practice to begin and conclude each seam with a few reverse stitches, ensuring that the thread locks in place securely. This simple but crucial step prevents the stitches from loosening or unraveling, contributing to the overall stability and longevity of the finished project.
Imagine sewing a straight line along the edge of a fabric to create a seam. Before reaching the end, you would engage the reverse stitch function, sewing backward for a short distance. This backward stitching essentially locks the thread in place, reinforcing the seam’s integrity. It may seem like a small step, but it plays a significant role in maintaining the strength and durability of the sewing work.
What is a Walking Foot and How It Works?
When it comes to sewing, one essential tool that often proves invaluable is the walking foot. This attachment is designed to work with your sewing machine, offering a solution to the common issue of fabric layers shifting while being stitched. The walking foot is particularly useful when dealing with multiple layers of fabric or tricky materials like leather or vinyl.
Essentially, a walking foot has feed dogs on both the bottom and top, mimicking the movement of the machine’s built-in feed dogs. This ensures that the layers of fabric are fed through the machine evenly, preventing slippage and ensuring more precise stitching. The primary mechanism behind its operation involves the synchronized movement of the walking foot with the sewing machine’s feed dogs, allowing for a consistent grip on the fabric throughout the stitching process.
To understand how a walking foot works, it’s crucial to grasp the role of the feed dogs. Standard sewing machines have feed dogs beneath the presser foot, which move the fabric forward during stitching. However, when working with thick or slippery materials, the lower layers may not feed at the same rate as the top layer, leading to misalignment and uneven stitches.
This is where the walking foot comes into play. It features its set of feed dogs, usually positioned on top of the foot, which work in harmony with the machine’s lower feed dogs. As the presser foot descends, the walking foot engages, gripping the fabric from the top and ensuring it advances uniformly with the bottom layer. This synchronized movement of both sets of feed dogs prevents slippage and guarantees a smooth, even feed, resulting in neatly stitched seams.
Imagine you’re working on a quilt, where precise stitching is crucial to maintaining the pattern and overall integrity of the design. Using a walking foot in this scenario would be advantageous, as it helps prevent the layers of fabric from shifting or bunching. The walking foot ensures that each layer is fed through the machine at the same rate, facilitating accurate stitching and a professional-looking finish.
Whether you’re a beginner or an experienced sewer, understanding the role and functionality of a walking foot can significantly enhance the quality of your sewing projects, especially when dealing with challenging fabrics or intricate patterns.

Can You Reverse Stitch With a Walking Foot?
The short answer is no, a walking foot is not designed for reverse stitching. A walking foot, also known as an even feed foot, is specifically crafted to feed fabric layers evenly through the sewing machine. It has built-in feed dogs that work in conjunction with the machine’s feed dogs to prevent layers of fabric from shifting during sewing. However, unlike a regular presser foot, a walking foot doesn’t have the mechanism needed for reverse stitching.
When you engage the reverse stitch function on your sewing machine, it typically involves the feed dogs moving in the opposite direction. Since a walking foot lacks this reverse mechanism, attempting to use reverse stitching with it may result in the fabric not moving as intended, causing potential issues like uneven stitching or fabric bunching. To achieve reverse stitching, it’s advisable to switch back to a regular presser foot designed for such operations. Always refer to your sewing machine manual for guidance on proper usage and compatible attachments.
In summary, while a walking foot is excellent for maintaining consistent fabric feed during forward stitching, it’s not suitable for reverse stitching due to its design limitations. When your project requires reverse stitching, switching to a standard presser foot will ensure smooth and effective results.
What Can You Do with a Walking Foot?
A walking foot is a sewing machine attachment designed to feed fabric layers evenly through the machine. It’s a versatile tool that enhances your sewing capabilities in various ways.
- Preventing Fabric Shifting: The primary function of a walking foot is to prevent layers of fabric from shifting during the sewing process. This is particularly useful when working with slippery or stretchy materials.
- Even Feeding: The walking foot has a set of feed dogs on the top, mirroring those on the bottom of your machine. This dual feed system ensures that both layers of fabric are moved together, preventing one layer from advancing faster than the other.
- Quilting: When quilting, a walking foot is indispensable. It helps maintain even stitches and prevents the layers of fabric and batting from shifting, ensuring a professional-looking quilt.
- Thick Fabrics and Multiple Layers: Sewing through thick fabrics or multiple layers can be challenging, but a walking foot makes it easier by evenly distributing the layers, preventing uneven stitches, and reducing the risk of needle breaks.
- Matching Stripes and Patterns: For projects where pattern matching or stripe alignment is crucial, a walking foot ensures that both layers of fabric advance uniformly, helping you maintain precise pattern placement.
- Topstitching: Achieving neat and even topstitching can be tricky, especially on challenging fabrics. The walking foot excels at this task, guiding both layers smoothly for a polished finish.
- Leather and Vinyl: Working with heavy materials like leather or vinyl can be demanding. The walking foot excels in handling these materials, preventing slippage and ensuring precise stitching.
- Ease in Sewing Knits: When sewing stretchy fabrics like knits, a walking foot prevents the layers from stretching unevenly, resulting in a more professional-looking and durable seam.
In summary, a walking foot is a must-have tool for sewers looking to achieve consistent, professional results across a variety of projects, from quilting to working with challenging fabrics. Its ability to ensure even feeding and prevent fabric distortion makes it a valuable asset in the sewing toolkit.
How to Use a Walking Foot on Your Sewing Machine?
Using a Walking Foot on your sewing machine is essential for handling tricky fabrics and ensuring smooth, even stitches. Unlike a regular presser foot, a walking foot has built-in feed dogs that move in sync with the machine’s feed dogs, preventing layers of fabric from shifting.
- Select the Appropriate Foot: Ensure you have the right walking foot for your sewing machine model. Check your machine’s manual or contact the manufacturer if unsure.
- Remove the Standard Presser Foot: Lift the presser foot lever to release the standard foot. This allows space for attaching the walking foot.
- Align and Attach the Walking Foot: Position the walking foot over the needle clamp, aligning the fork with the needle clamp screw. Lower the presser foot lever to secure the walking foot in place.
- Engage the Walking Mechanism: Most walking feet have a lever or button to engage the walking mechanism. Refer to your machine’s manual to locate and activate this feature.
- Thread the Machine: Thread the machine as usual, making sure to follow the threading path specified in your sewing machine manual.
- Adjust Presser Foot Pressure: If your machine allows it, adjust the presser foot pressure according to the thickness of your fabric. This ensures optimal feeding and prevents uneven stitching.
- Test on Scrap Fabric: Before starting your actual project, sew a test piece to observe how the walking foot handles the fabric. Adjust the settings if needed.
How to Reverse Stitch on a Sewing Machine?
Reverse stitching on a sewing machine is a crucial skill that helps reinforce seams and prevents unraveling. It involves sewing backward to secure the beginning and end of a stitch.
- Locate the Reverse Stitch Button:
- Look for the reverse stitch button on your sewing machine. It’s usually located near the front or side of the machine.
- This button is essential for initiating the reverse stitching process.
- Hold the Fabric Steady:
- Before you begin sewing, make sure your fabric is positioned correctly under the presser foot.
- Hold the fabric steadily with both hands to avoid any unwanted movement during the reverse stitching.
- Start Sewing Forward:
- Begin sewing in the forward direction by pressing the foot pedal or using the start button.
- Sew the initial part of your seam, following your desired stitch length.
- Activate Reverse Stitching:
- Once you’ve sewn a short distance forward, press and hold the reverse stitch button.
- Keep holding the button while the machine sews backward.
- Stitch in Reverse:
- The machine will sew in reverse, tracing back over the stitches you just made.
- Continue holding the reverse stitch button until you’ve reached the point where you want to end the reverse stitching.
- Release the Reverse Stitch Button:
- When you’re ready to resume forward stitching, release the reverse stitch button.
- The machine will switch back to sewing in the forward direction.
- Complete the Seam:
- Continue sewing in the forward direction to complete your seam.
- The reverse stitching at the beginning and end reinforces the seam, preventing it from unraveling over time.
Tips to Use a Walking Foot
Here are some practical tips to make the most out of your walking foot:
- Install Correctly: Ensure your walking foot is properly installed, with the fork engaging with the needle bar. This guarantees effective coordination between the foot and the sewing machine.
- Match Walking Foot with Fabric: Choose the right walking foot for your project. For heavy fabrics, use a walking foot with teeth that can handle the thickness. For slippery materials, opt for a walking foot with built-in feed dogs.
- Adjust Presser Foot Pressure: Check your sewing machine manual to adjust the presser foot pressure accordingly. This helps in preventing uneven stitching and fabric puckering.
- Engage the Feed Dogs: Ensure the feed dogs on the sewing machine are engaged. This, combined with the walking foot, provides synchronized feeding of the fabric layers, preventing misalignment.
- Use Even Stitch Length: Maintain a consistent stitch length. Irregular stitches may indicate an issue with the walking foot or improper alignment, leading to uneven sewing.
- Test on Scrap Fabric: Before starting your main project, test the walking foot on a scrap piece of fabric. This allows you to check the tension, stitch quality, and overall performance without risking your final product.
- Keep an Eye on Tension: Monitor the thread tension to avoid loose or tight stitches. An imbalanced tension can affect the overall appearance and durability of your sewing.
- Go Slow and Steady: When using a walking foot, it’s generally better to sew at a slower pace. This provides better control, especially when dealing with thick or challenging fabrics.
- Use Guide Bars for Precision: Many walking feet come with guide bars to help maintain even seam allowances. Take advantage of these guides for precise stitching, especially when quilting or piecing.
- Clean and Maintain: Regularly clean your walking foot to remove lint and debris. Proper maintenance ensures smooth operation and prolongs the life of the foot.
By following these tips, you’ll enhance the performance of your walking foot, making your sewing projects more enjoyable and professional-looking.
Sewing Machine Maintenance Tips
- Clean Regularly: Ensure to clean your sewing machine after every project. Use a small brush to remove lint and dust from the feed dogs and bobbin area.
- Oil Properly: Lubricate your sewing machine as recommended in the manual. This helps reduce friction between moving parts, preventing wear and tear.
- Change Needles: Replace needles regularly, especially after completing a significant project. Dull or bent needles can cause thread breakage and damage the fabric.
- Thread Quality Matters: Choose high-quality thread appropriate for your project. Low-quality thread can leave behind lint, affecting the machine’s performance.
- Check Tension Settings: Periodically, check and adjust tension settings. Incorrect tension can result in uneven stitches. Refer to your machine’s manual for guidance.
- Bobbin Care: Ensure the bobbin area is clean. Remove lint or tangled thread, and use the correct bobbin size for your machine.
- Protect from Dust: When not in use, cover your sewing machine to prevent dust accumulation. Dust can clog the machine and affect its overall functionality.
- Store Properly: Store your sewing machine in a cool, dry place to prevent rusting. Avoid extreme temperatures and humidity.
- Follow Maintenance Schedule: Adhere to the manufacturer’s recommended maintenance schedule. This helps identify potential issues before they become major problems.
- Professional Servicing: If you encounter persistent issues, consider taking your sewing machine to a professional for regular servicing. A trained technician can address underlying problems and prolong the machine’s life.
Conclusion
In conclusion, the walking foot proves to be a remarkable asset for sewers seeking precision and ease in their projects. Addressing the query, Can You Reverse Stitch With a Walking Foot, we’ve unveiled the seamless adaptability of this tool. Its ability to effortlessly navigate multiple layers of fabric while maintaining a consistent stitch pattern showcases its true prowess.
So, whether you’re quilting, working with heavy fabrics, or engaged in intricate patterns, the walking foot, with its versatile reverse stitching capability, stands as an indispensable companion in your sewing journey. Elevate your creations with this invaluable tool and experience the difference firsthand.
References
- Sewing dynamics: part I: measuring sewing machine forces at high speeds
- Ergonomics issues among sewing machine operators in the textile manufacturing industry in Botswana
- Experimental determination of the law of vibration of the improved jet mechanism of the sewing machine
- The Effect of Throat Plate Design on. Sewing Damage on an Overlock Sewing Machine